If you’re having trouble with Outlook not updating, don’t worry – there are some easy steps you can take to resolve the issue. Follow this step-by-step guide to get your Outlook up-to-date and running smoothly once again.
Get Quick Steps to Fix Outlook Not Updating Automatically
Step 1- Verify Outlook Settings
Outlook prompts users when it fails to connect to the mailbox server and asks for the new password if changed. Sometimes, it may not prompt. Thus, you can check your email credentials and account settings manually to ensure Outlook establishes a connection with the mailbox server and synchronizes mail items to/from the server.
The steps are as follows:
- In Outlook, navigate to File > Account Settings > Account Settings and select your email account.
- Click Change > More Settings.
- Verify and update the email credentials and check the email account settings are correct.
Step 2- Toggle Cached Exchange Mode
Cached Exchange Mode is highly recommended for live Exchange Server and Office 365 email accounts to ensure Outlook performance. When the emails are not updating or you are experiencing sync errors, toggling Cached Exchange Mode may help resolve the issue. When you disable the Cached Exchange Mode, Outlook connects to the server directly and all changes made are reflected immediately across all devices and OWA.
You can toggle the Cached Exchange Mode to try to fix the Outlook not updating emails automatically issue. The steps are as follows:
- In Outlook, go to File > Account Settings > Account Settings.
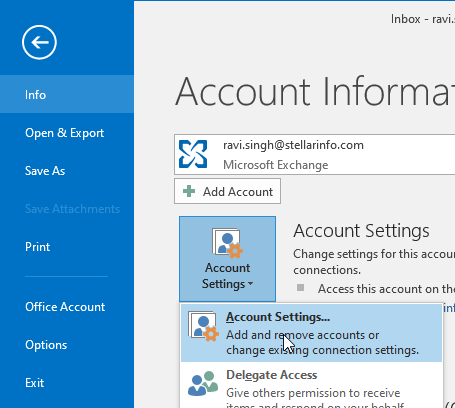
- Under the Email section, click on your email account and then click Change.
- Under the Offline Settings, disable the Use Cached Exchange Mode option.
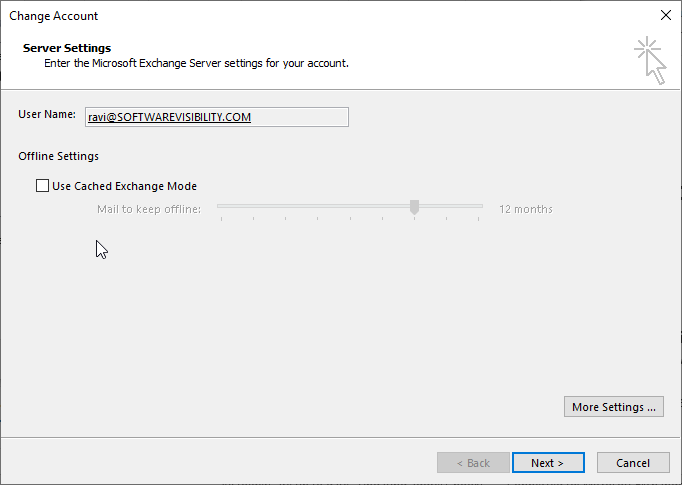
- Click Next.
- Restart Outlook for the changes to take effect.
Outlook will connect to the mailbox server in Online Mode. Any changes made are updated in real-time and reflected in the Outlook client and web app.
Step 3- Repair Microsoft Office
You may also try repairing Microsoft Office to fix the emails not updating automatically issue on your Windows laptop or PC. The steps are as follows:
- Open Control Panel and click Uninstall a program under Program.
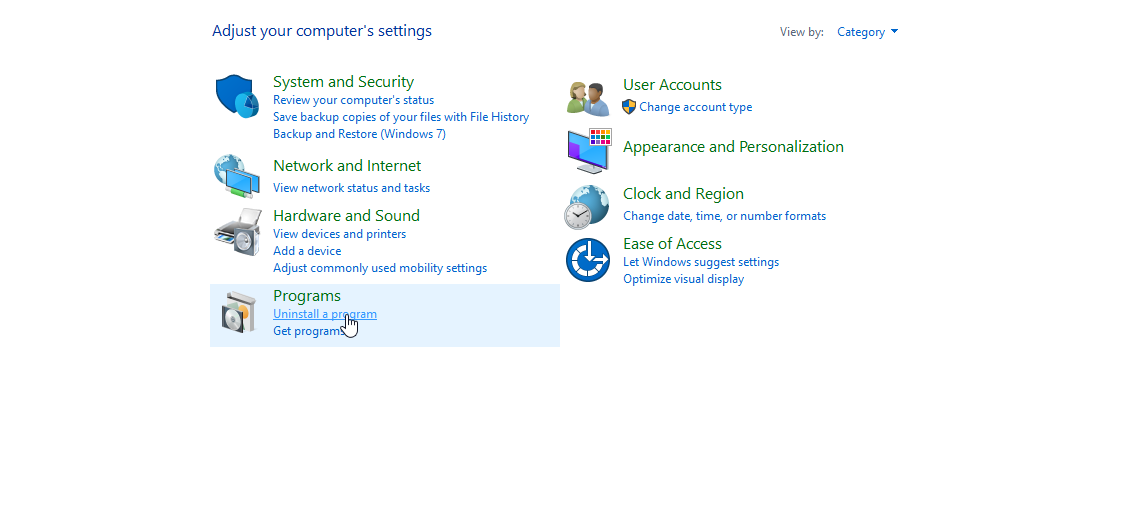
- From the list, choose Microsoft Office…. and click Change.
- From the available options, choose Repair and click Continue.
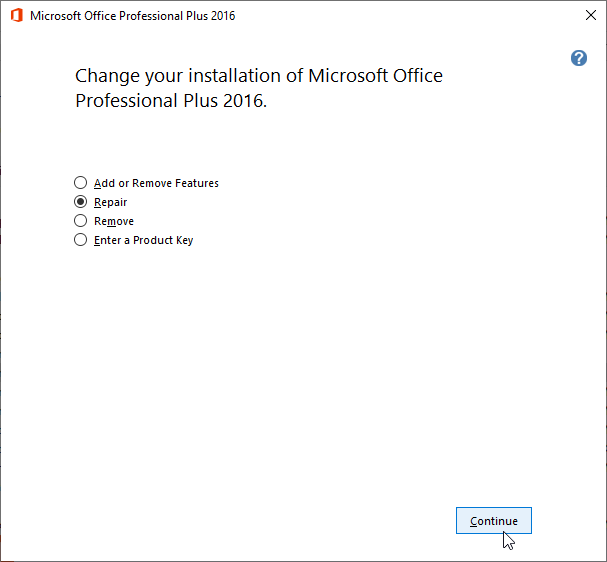
- This will start repairing the Microsoft Office (including Outlook) program files.
- After the repair, restart the system and then launch Outlook. Check if the emails are now updating.
Step 4- Update folders manually
Due to certain unknown reasons, the data updating task might not work as it should. You can update the data manually to get a clearer picture of whether some other factor is responsible for the issue.
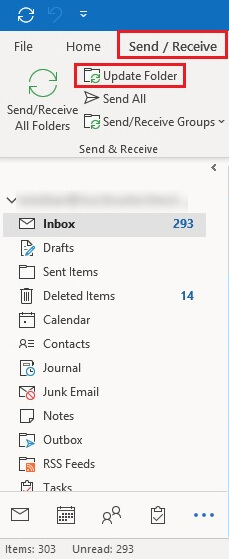
- Launch MS Outlook and move to the Send/Receive tab.
- Click on the Update Folder option and check if the problem still exists.
Step 4- Turn on the ‘Send immediately when connected’ option
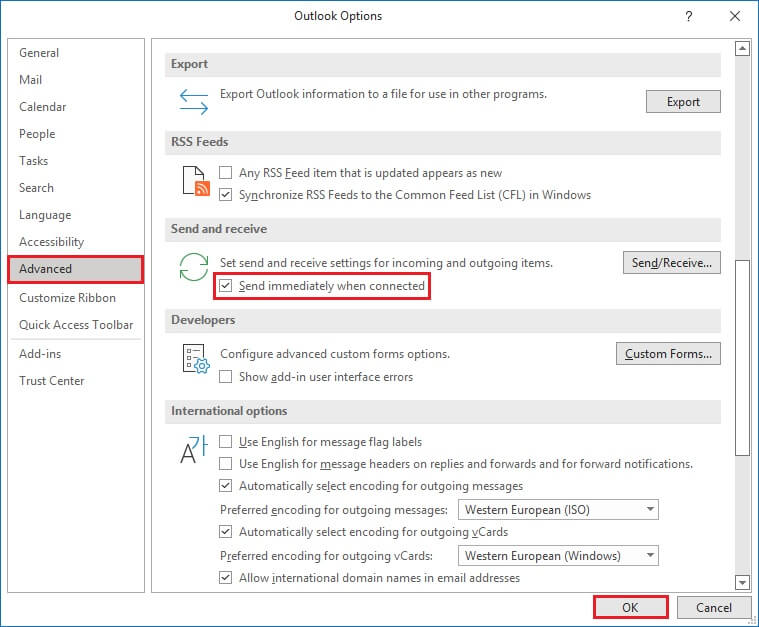
Before moving to other solutions, ensure that the ‘Send immediately when connected’ facility is enabled when accessing your Exchange server account. It will always make sure to keep the synchronization going.
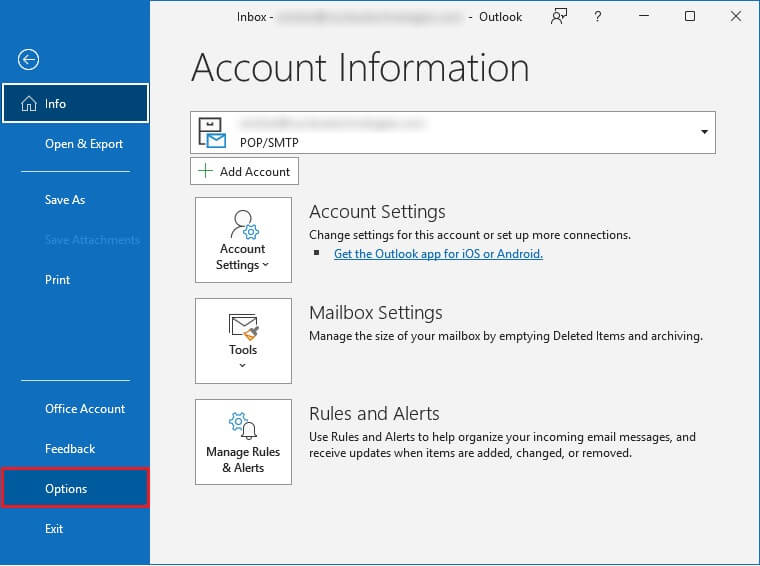
- Click File > Options from the left panel.
- Now, select the Advanced option. Scroll down to the Send and receive section and check Send immediately when connected. Finally, click on OK.
Your emails should automatically update. If not, continue following the solutions given below.
Step 5- Recreate OST File
If the solutions discussed above did not work for you, try recreating the offline Outlook data file (.ost). The steps are as follows:
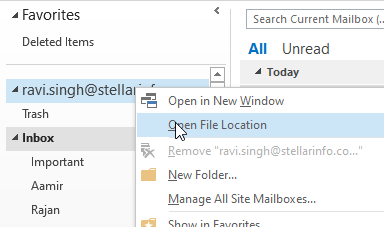
- Open Outlook and right-click on your email in the left pane.
- Choose Open File Location. This will open the OST file location.
- Once located, close the Outlook client and copy the OST file to another drive or folder location.
- After copying, delete the default Outlook OST file and start Outlook.
- Outlook will check for the OST file. Since you have deleted it, Outlook will create a new OST file and synchronize all mail items and emails from the mailbox server to this local OST file. This may take a while to complete depending on your mailbox size.
- After the synchronization is complete, check your mail folders and items.
Step 6 – Remove incompatible Add-ins
Some add-ins might not be compatible with the Outlook program, so they start throwing underlying problems simultaneously. Removing them and then continuing with your work without errors and interruptions is better.
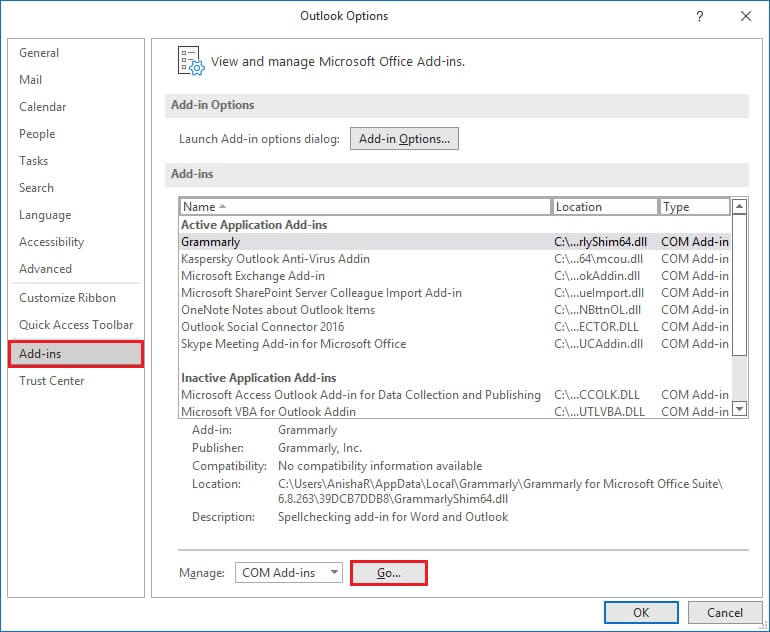
- Select the File tab and click on Options.
- From the new window, select Add-ins.
- The complete list of all the add-ins will appear. Select Go.
- Now, uncheck all of them and click on OK.
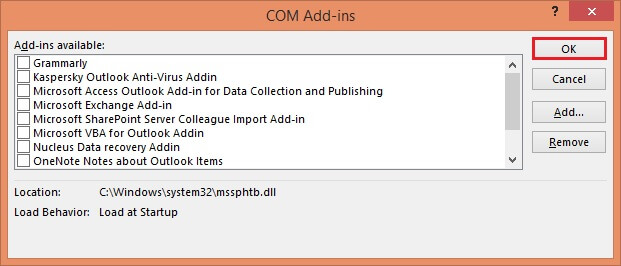
- Restart Outlook and enable one add-in at a time to find the faulty one. Eventually, you can remove it permanently.
Step 7- Set up a new Outlook profile
A corrupted profile is also responsible for not being able to update the mail folders in Cached mode promptly. You should create a new Outlook profile and configure your email to avoid further issues.
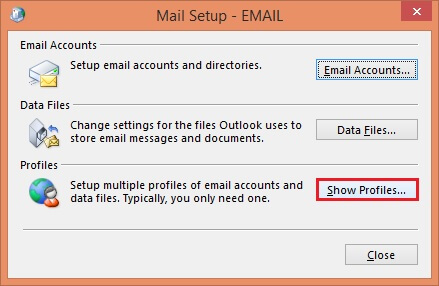
- In Control Panel in your system and select Mail.
- The Mail Setup window will open. Here, select Show Profiles.
- Click on Add to create a new Profile. Enter all the required credentials.
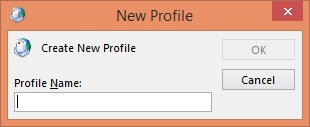
- Launch Outlook and select the New Profile prompt. It will start synchronizing all the items.
Common Reasons for Outlook Email Not Auto-Updating
There are several reasons that can affect Outlook’s performance and result in the emails not updating automatically issue, such as:
- Poor network connection.
- Faulty or incompatible add-ins.
- Wrong email settings.
- Conflict with other apps.
- Corrupt or damaged Outlook profile.
- Oversized local cache (.ost).
- Inconsistent Outlook data file (.ost).
- Low mailbox storage or local drive storage.
In conclusion, if you are experiencing the issue of Outlook not updating, it can be a frustrating and disruptive problem. However, there are several steps you can take to resolve the issue and get back to managing your emails with ease. By checking your internet connection, email settings, send/receive settings, clearing your cache, and repairing your installation, you can troubleshoot the issue and find a solution that works for you.
I am Komal Hatwaani, aims to provide readers with informative and engaging content that covers everything from technology and business to entertainment and lifestyle. This website dedicated to delivering high-quality content that informs, entertains, and inspires our readers.
Join us on our journey as we continue to explore the ever-evolving landscape of news and information, providing you with valuable insights and perspectives that enrich your digital experience.