Are you facing problems with your Lenovo laptop keyboard not functioning,Need guidance on how to resolve ‘Lenovo laptop keyboard not working’ . Perhaps your ThinkPad keyboard isn’t working or your Ideapad Lenovo laptop keyboard is locked?
Basic Troubleshooting Method for Laptop and Desktop not working for Lenovo :
There are many different methods to resolve the keyboard on Lenovo laptop keyboard not working problem. We’ll work our way down the list of solutions from basic troubleshooting steps to more technical aspects.
Method-1 Uninstall Multiple Keyboards
Having two or more keyboards installed on a single device could be the reason why you’re facing the Lenovo keyboard not working problem in Windows 10. In this situation, you can try to uninstall the external keyboard device from your computer and check if that helps resolve the problem. Below are the steps to do it.
- Open Device Manager on your computer.
- Expand the Keyboards section in the Device Manager.
- Right-click on the keyboard you want to remove and select the Uninstall device option from the pop-up menu.
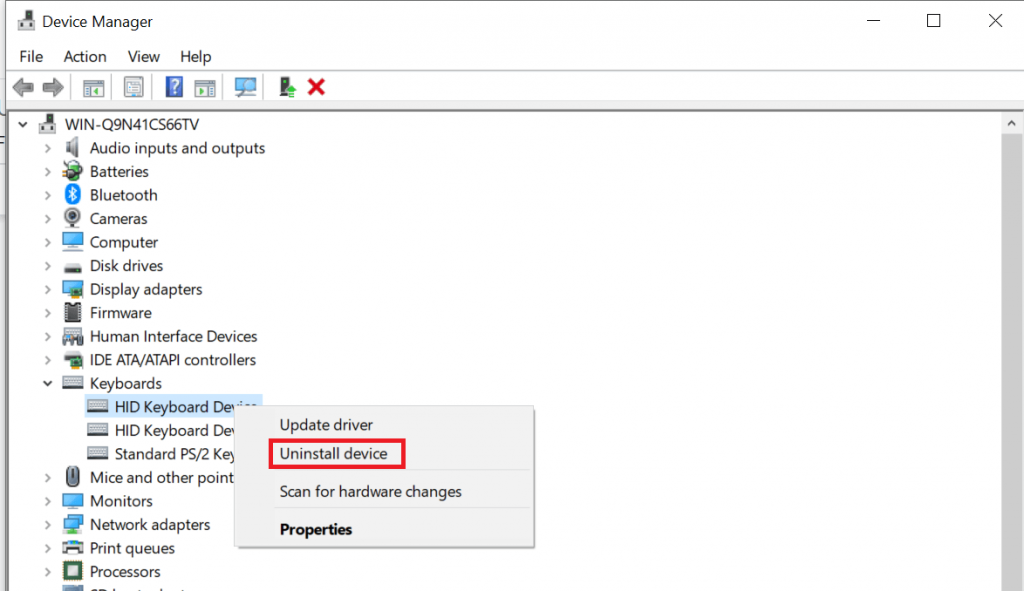
After the uninstallation process is finished, restart your device and check whether the Lenovo Laptop keyboard not working on the Lenovo laptop problem is resolved or not.
Method-2 Update The Keyboard Driver
The keyboard driver may become out of date on your Lenovo keyboard and cause the laptop keyboard not working issue. You need to constantly update drivers on your laptop otherwise they will become unable to communicate with the rest of the hardware on your laptop. To update your keyboard drivers, follow the steps given below.
- Press The Windows Key + X.
- Click On Device Manager From The Menu List.
- Expand Keyboards And Mice Segment.
- Right-Click On Your Keyboard And Select The Update Drivers Option.
Once you have successfully updated the drivers you will need to restart your laptop in order to let the update take effect. This will make sure that you have fixed the Lenovo yoga keyboard not working Windows 10. If you are still not able to use the keyboard on your Lenovo laptop then there can be some other issue with the laptop or keyboard. Try the next method given in the next paragraph.
Method-3 Switch Off the Filter Keys
The Lenovo laptop keyboard not working issue can also be caused if there is something wrong with keyboard settings like filter key. A third-party app on your computer make changes to these settings. A user on your computer can also do this. Follow the below-given steps to change Filter key settings of Lenovo keyboard.
If you have turned off the filter keys mistakenly, ten it could be the reason behind this issue. You can fix it in the following way:
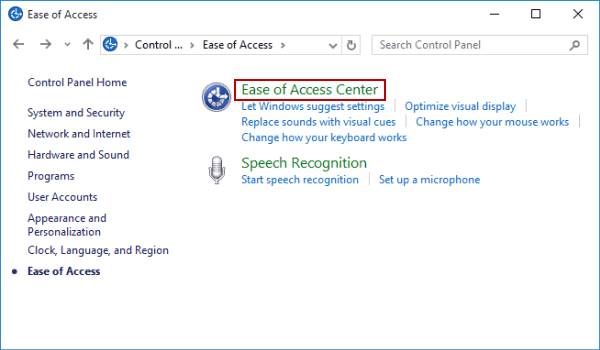
Step 1: Go to the Control Panel and then to the Ease of Access.
Step 2: Then, click on the Ease of Access Center.
Step 3: After this, you have to choose the “Make the keyboard easier to use” option.
Step 4: Finally, you will have to untick the option “Turn on Filter Keys” located under the “Make it easier to type” section.
Step 5: Press the Apply and OK button to confirm and save the modifications made.
Method 4: Run the Windows Troubleshooter
Microsoft Windows operating systems come with a bunch of troubleshooters to help you find and fix problems with your PC. Here are the steps you need to perform for doing so.
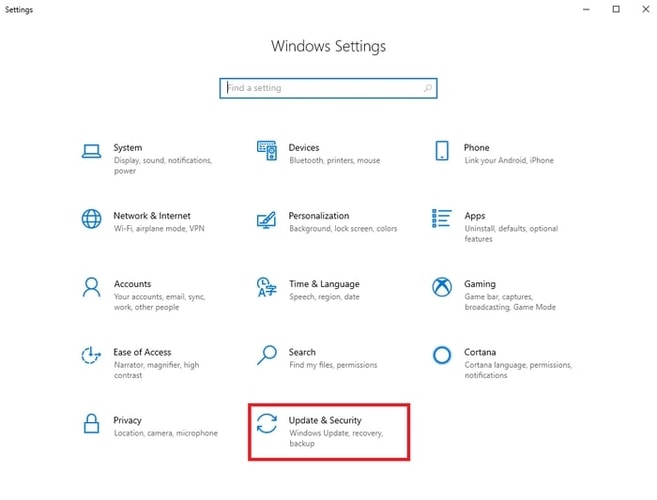
- On your keyboard, press the Windows logo and I keys together to open the Windows Settings app on your PC.
- Find the Update & Security option and click on it.
- Select the Troubleshoot option from the left navigation panel.
- Look for the Keyboard option in the right section and click on it.
- Next, click on the Run the troubleshooter.

- Restart your computer after the keyboard troubleshooting process ends.
After rebooting, your Lenovo laptop keyboard should start working again. However, if the problem persists, move on to the next solution.
Method 5: Reinstall Synaptics Driver
If the Lenovo laptop keyboard not working problem still persists then you can try to uninstall and reinstall the Synaptics Driver in order to fix it.
Step 1: Launch the Device Manager from the Control Panel and locate the Synaptics driver.
Step 2: Right-click on the Synaptics driver and then select the Uninstall option from the context menu.
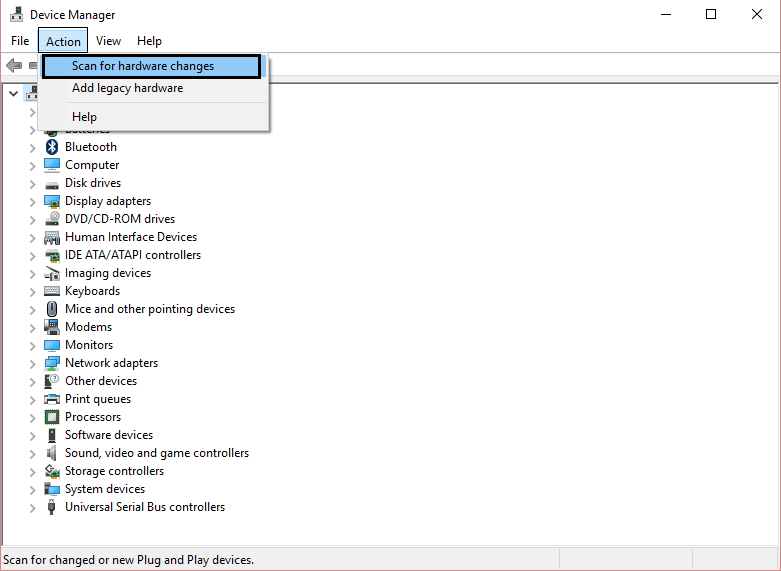
Step 3: Then, click on “Scan for hardware changes” from Action and let Windows search for and reinstall the Synaptics driver on the laptop.
Step 4: Ensure to restart the Lenovo system again.
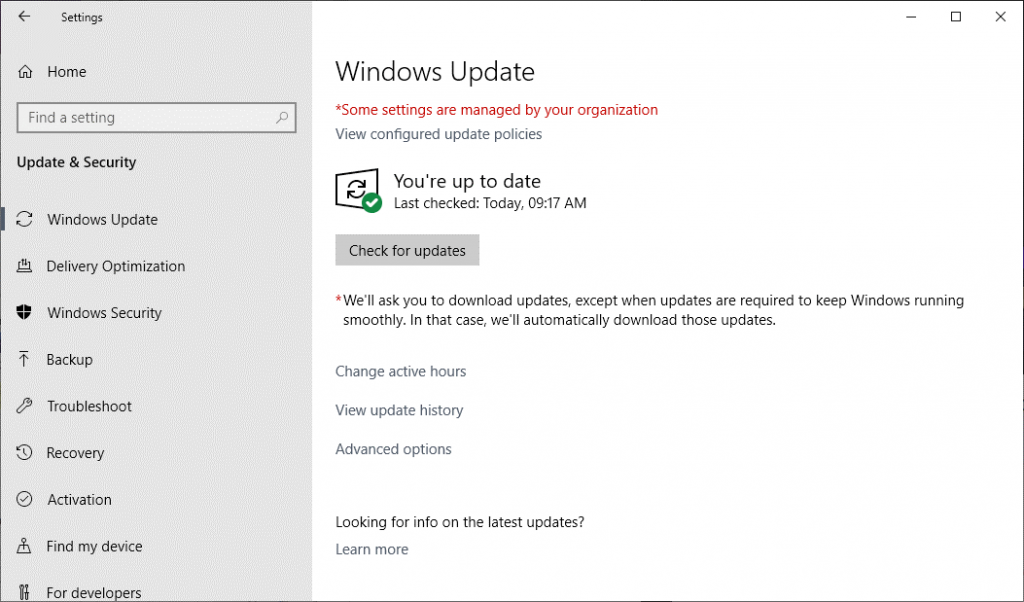
Method 6: Check for Windows Updates
If the Windows 10 system updates have not been installed for a long time now, then it is possible to face some troubles like the Lenovo laptop keyboard not working issue. So, it is recommended that users should regularly install Windows updates. You can do it in the following way:
Step 1: Navigate to the Lenovo laptop’s Settings app.
Step 2: Go to the Update & Security section.
Step 3: Then, click on the Check for Updates button on the main screen and let Windows search for the latest updates and install them on your PC.
Method 7: Update the Lenovo Keyboard Driver
If your problem of the Lenovo laptop keyboard not working hasn’t been resolved yet, then this method will surely work for you. To make the Lenovo keyboard functional again, all that you are require to do is update your outdated and corrupt keyboard drivers to the newly released driver versions. There are two options available to do so: manual and automatic.
Update Lenovo Keyboard Driver Manually
You can manually download and install the latest keyboard drivers for your Lenovo laptop by using the Windows built-in utility called Device Manager. Here are the required steps.
- Type device manager in the search box and then select the same from the menu.’
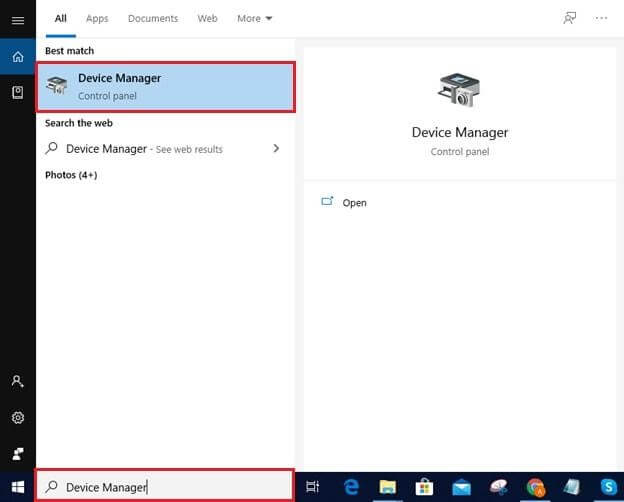
- Expand the ‘Keyboards’ category. Locate and right-click on the keyboard device and select the ‘Update Driver’ option from the context menu.

- Next, click on the ‘Search automatically for updated driver software’ option.
- Now, wait for the Windows operating system to find and install the latest driver version on your computer.
Method 8- End Task Cortana
Sometimes Cortana process also may create this problem. As we have performed above step same way we need to End task cortana process in task manager. To close Cortana process follow the steps below.
- Right-Click On Taskbar And Select The Task Manager.
- Find Cortana Under Background Processes.
- Select It And Click On End Task.
Method 9- Run Text Services Framework
Windows text service framework may also cause keyboard not working problem. Text service framework is essential for keyboard to perform. To run text service Framework follow the steps below.
- Search Task Scheduler In The Search Box On The Taskbar.
- Open Task Scheduler.
- Now Task Schedule Library By Clicking Small Arrow Next To It.
- Then Microsoft.
- Open Windows.
- Find TextServicesFramework.
- Now Click On Run From Right Panel.
Now check if your keyboard is working.
Method 10- Update Windows 10 OS
Whether you are using a modern Lenovo laptop or an old one, you will need to perform an update on Windows 10 every once in a while. An out of date Windows 10 OS can cause the Lenovo laptop keyboard not working issue.
Follow the steps given below to update Your OS.
- Go To Start Menu And Click Settings
- Click The Update And Security
- Choose The Windows Update
- Now Click On The Check For Updates Button
Let the system find updates online and install them. Once you have successfully update Windows 10, you will need to restart the Lenovo laptop. The problem should be fixed with updating the Windows 10 OS. Now there should not be any problem in using the keyboard on your laptop.
Method 11- System Restore Windows 10 On Lenovo Laptop
System restores can be a very effective method to fix the Lenovo Laptop keyboard not working issue.
- Type System Restores In The Search Box.
- Select Create A Restore Point Option From The Result.
- Choose The System Restore Button.
- Click The Next Button In The System Restore Window.
- Select The Earliest Restore Point In Your System And Click On Next.
- Now Click The Finish Button
Now that you have performed the system restore, any harmful changes made to the Lenovo laptop will be reversed and you should be able to use the laptop keyboard. System restore should fix the Lenovo laptop keyboard not working issue.
Read also this – click here to get information Epson printer not printing anything.