Whether you want to save a YouTube video you’re watching, or you want to show someone a problem you are having on your computer, it’s easy to take a video of your screen on a Mac. You can even record audio, show your mouse clicks, and more. Here’s how to record your entire screen or just a portion of it on a Mac, no matter how old your computer is.
How to Screen Record with Keyboard Shortcuts
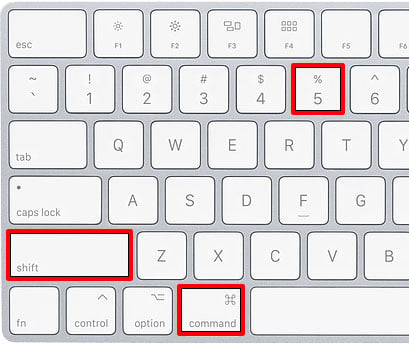
To record your screen on a Mac, press the Command + Shift + 5 keys on your keyboard. Then select either the Record Entire Screen or Record Selected Portion buttons in the pop-up toolbar that appears at the bottom of your screen. Finally, click Record.
- Press the Command + Shift + 5 keys on your keyboard. This will open the Screenshot Toolbar at the bottom of your screen.
- Then select Record Entire Screen or Record Selected Portion. The fourth button after the “x” will let you record the entire screen. The fifth button will let you record a selected portion of the screen. You can see what each button does by hovering your mouse over each icon.
 If you choose to record a portion of your screen, you will see a box with broken lines appear on your screen. You can then click and drag the edges of the box around what you want to record.
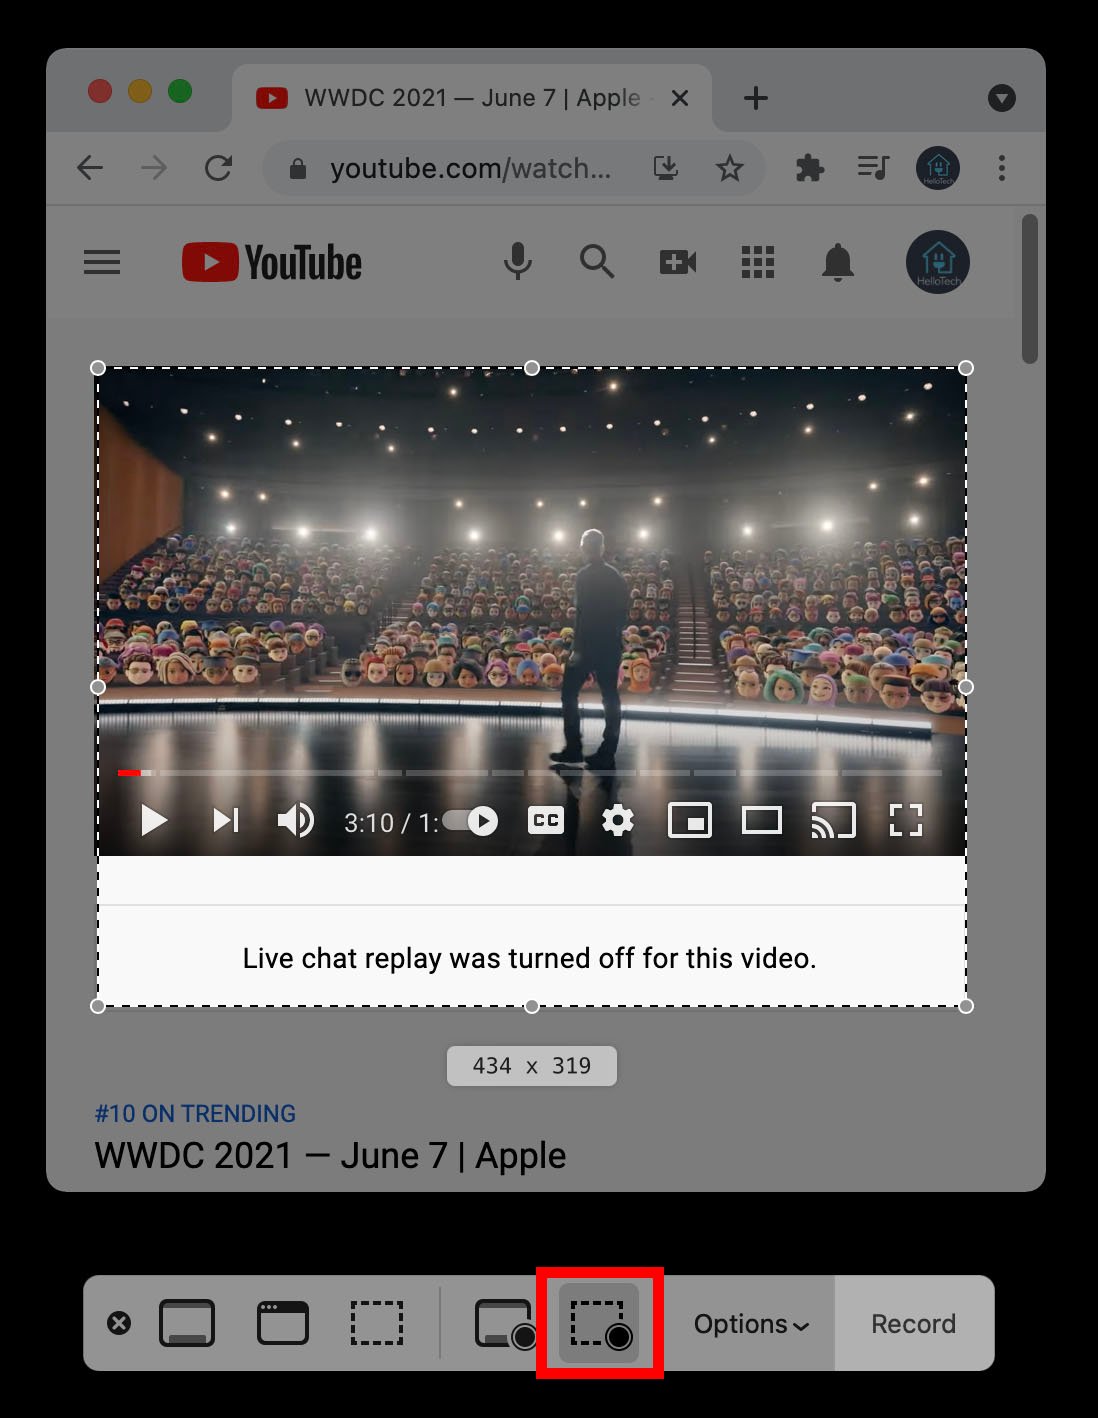
- Next, click Record. You will see this on the far-right side of the toolbar.

- Finally, click the square in circle icon at the top of your Mac’s screen to stop recording. Alternatively, you can also press Command + Control + Esc to stop recording.

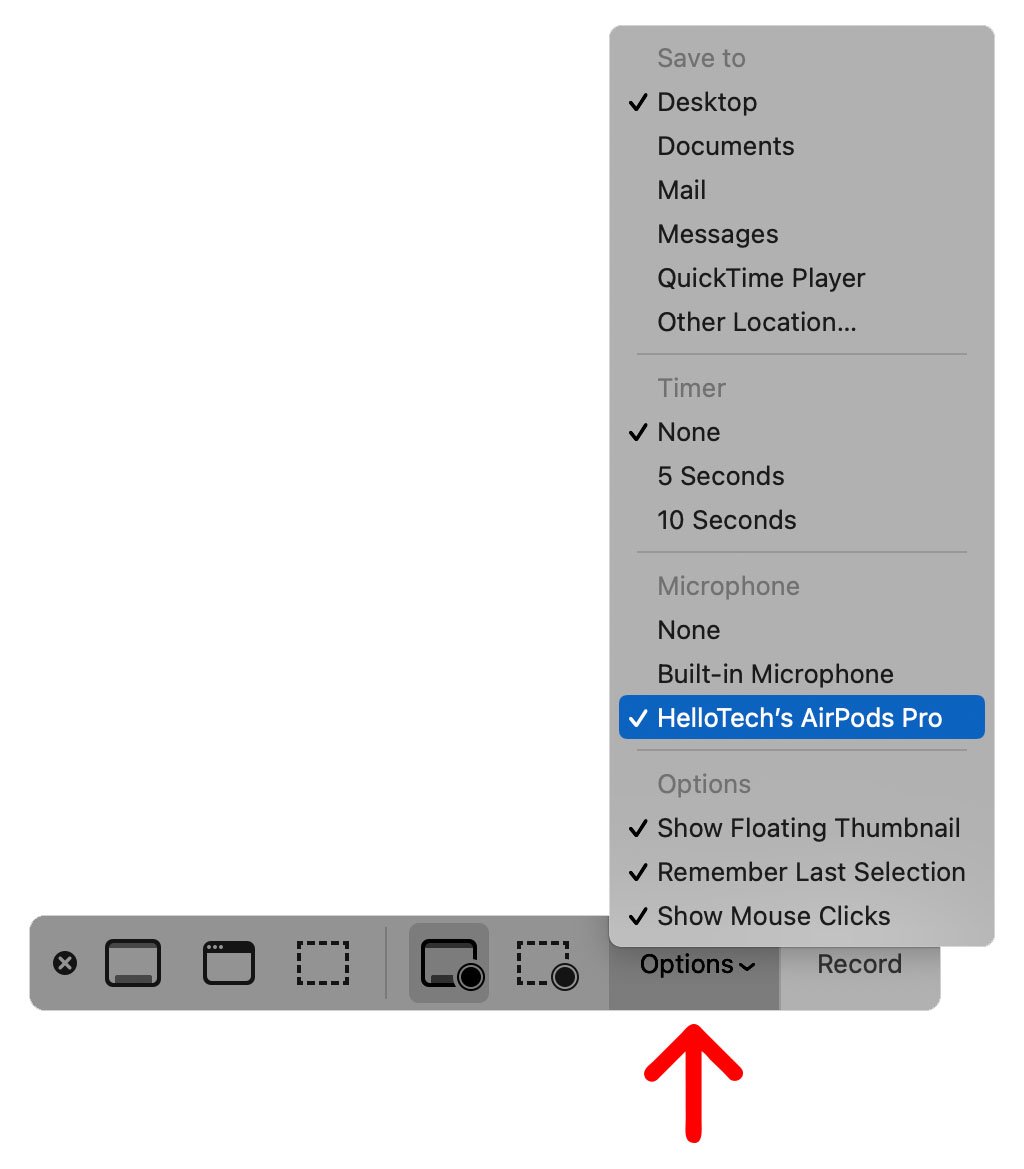
Note: If you want to record your voice or audio while screen recording, click the Options button in the screenshot toolbar. From here, you can also choose where to save your recording, set a timer before your recording starts, and show your mouse clicks in the video.
If you have an older Mac, or the keyboard shortcuts don’t work for you, you can also record your screen using the QuickTime app. Here’s how:
How to Screen Record Using QuickTime
To record your screen on a Mac, open the QuickTime app and click File in the menu bar at the top of your screen. Then select New Screen Recording and click the red button in the pop-up window. To record audio, click
- Open the QuickTime Player app. This is an app that comes pre-installed on Mac computers. If you do not see it in your Applications folder, you can download it here.
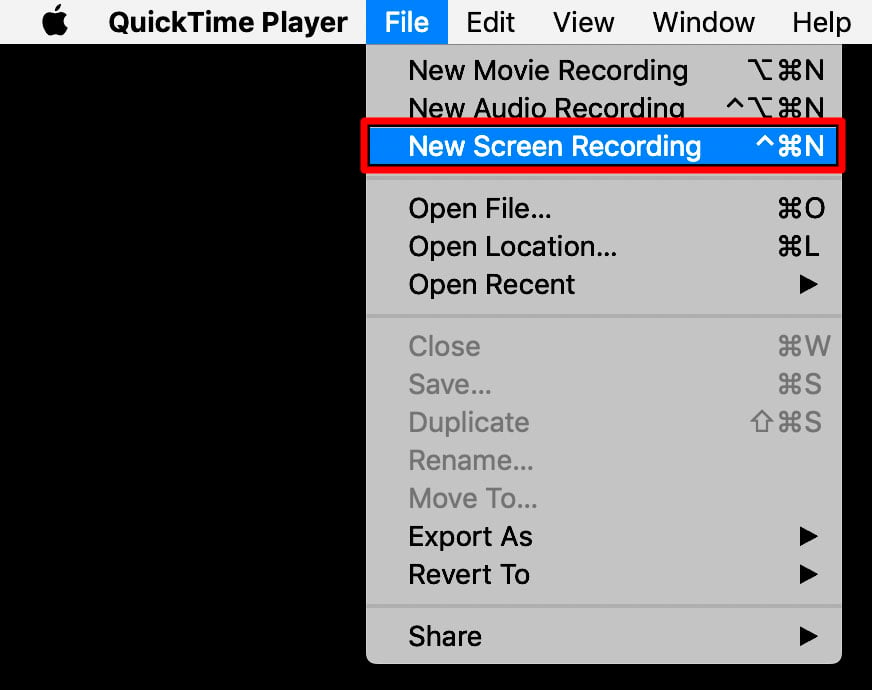
- Then click File. You will see this in the Apple Menu Bar at the top of your screen.
- Next, select New Screen Recording. This will open the Screen Recording window.
- Click the red button to start recording your screen. You can click anywhere on the screen to record the entire screen. You can also drag to select to record a certain area and then select Start Recording within that area.
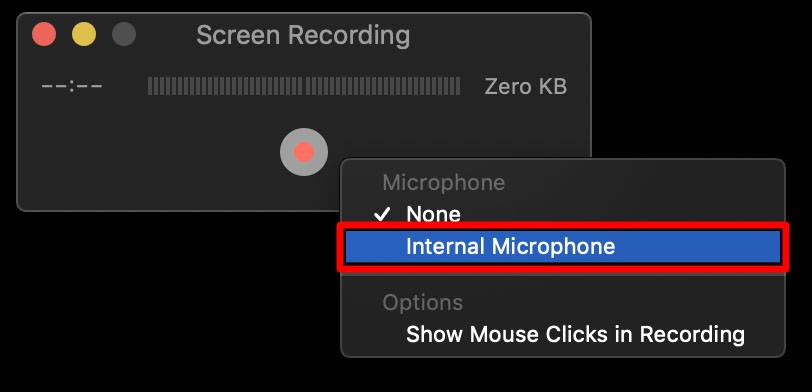
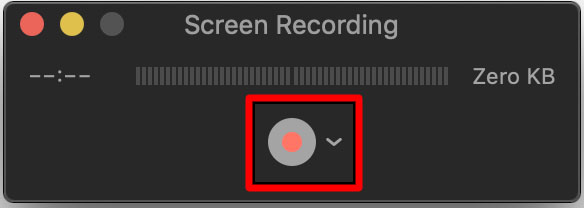 If you also want to record audio, click the arrow next to the red circle and choose a microphone to use.
- Click the black circle button in the menu bar to stop recording. Alternatively, you can also press Command + Control + Esc to stop recording.

After you press stop, QuickTime will open the video recording automatically. You can then choose to play, edit, or share the recording. You can also save it by clicking File > Save in the QuickTime menu, or by pressing the Command + S keys.
I am Komal Hatwaani, aims to provide readers with informative and engaging content that covers everything from technology and business to entertainment and lifestyle. This website dedicated to delivering high-quality content that informs, entertains, and inspires our readers.
Join us on our journey as we continue to explore the ever-evolving landscape of news and information, providing you with valuable insights and perspectives that enrich your digital experience.